
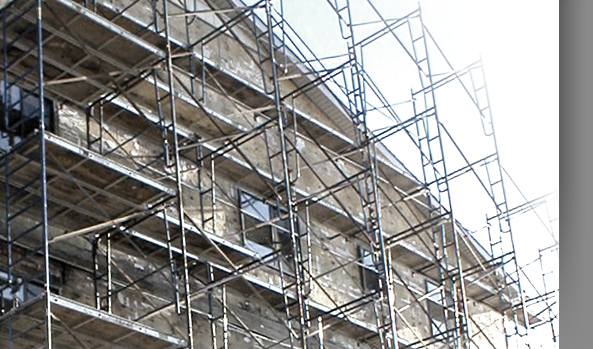

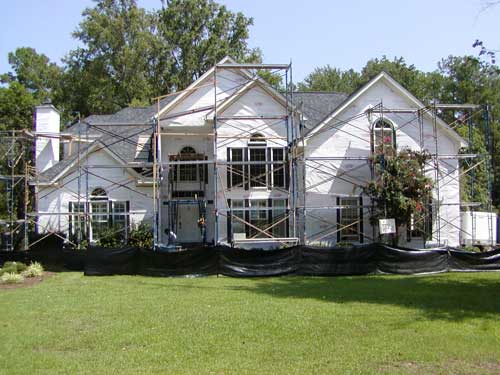
Details behind the wall cladding are as critical for protection against the elements as the cladding itself. The house wrap (or secondary weather barrier) and flashings must be correctly installed to protect against water intrusion damage. These are key ingredients for a successful restoration project. If they are not properly installed, the water intrusion may continue. Sometimes, there may be multiple methods to properly flash an area.
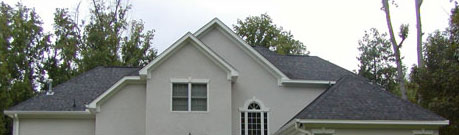
The house shown below exhibits a few of the most common types of details that need flashing. Click here to see more detailed images of this house and what details may exist behind the wall cladding.
Click on a yellow oval to see details about work on that area of home:
 |
|
||||||||||||||||||
|
|
|
|
|
||||||||||||||||
|
|
|
|
|
||||||||||||||||
 |
|
 |
|
||||||||||||||||
|
|
|
 |
|
||||||||||||||||
 |
|
||||||||||||||||||
 |
|
||||||||||||||||||
|
|
|
|
|
||||||||||||||||
|
|
|
||||||||||||||||||
 |
|
||||||||||||||||||
|
|
|
||||||||||||||||||
 |
|
|
|
||||||||||||||||
|
|
|
|
|
||||||||||||||||
|
|
|
||||||||||||||||||
 |
|
|
|
||||||||||||||||
|
|
|
|
|
||||||||||||||||
|
|
|
||||||||||||||||||
 |
|
||||||||||||||||||
|
|
|
||||||||||||||||||
|
|
|
|
|
|
|
|
|
|
|
|
|
|
|
|
|
|
|
|
|
 |
|
||||
|
|
|
 |
|
||
 |
|
||||
 |
|
|
|
||
|
|
|
||||
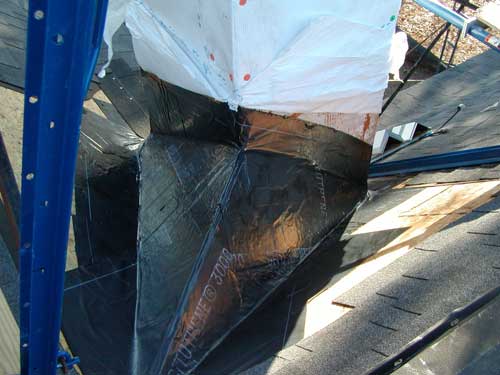
![]() CHIMNEY CRICKET
CHIMNEY CRICKET
Large amounts of water hit the back side of the chimney.
Flashing is formed at the top of the cricket to join with the step flashing.
Waterproof membrane added for extra protection.
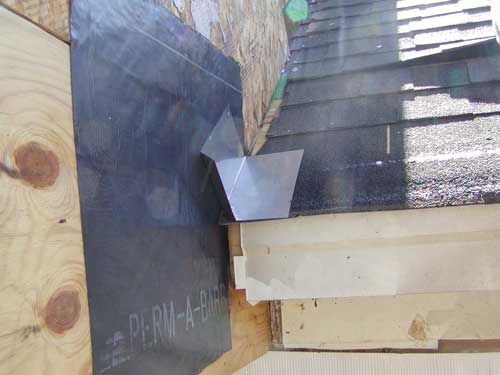
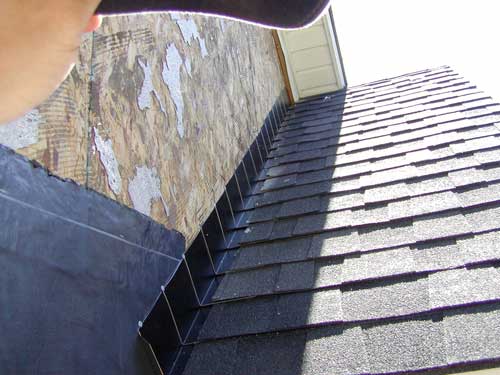
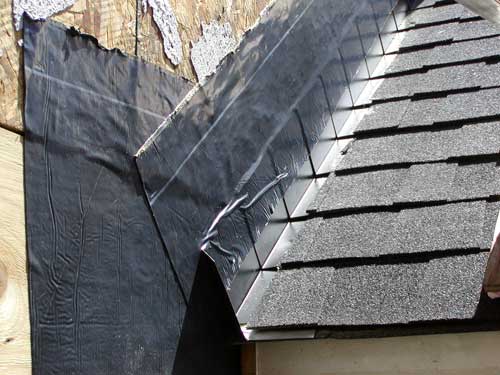
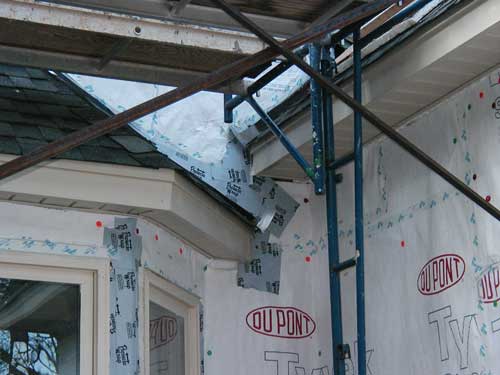
![]() KICK-OUT & STEP FLASHING
KICK-OUT & STEP FLASHING
This is an area that handles large amounts of water. A kick-out flashing should be a solid material without caulked seams. Step flashing should extend up the wall enough for proper overlapping of the wall cladding.
A waterproof membrane behind the kick-out offers added protection against water intrusion.
Step flashing installed.
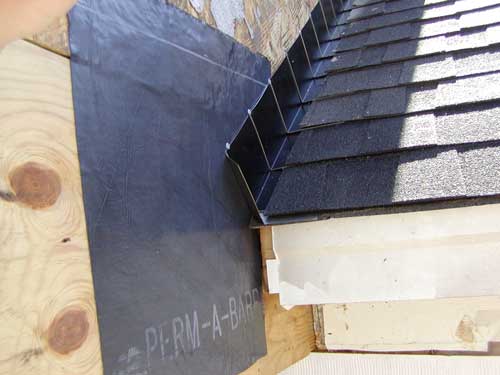
Waterproof membrane adds extra protection
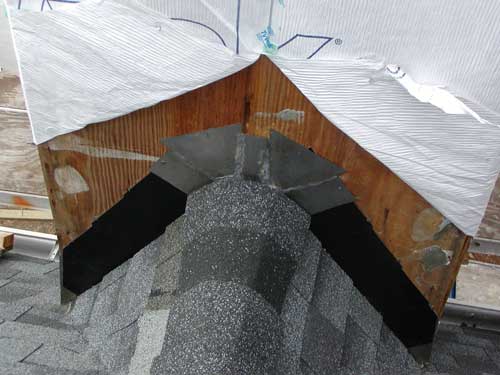
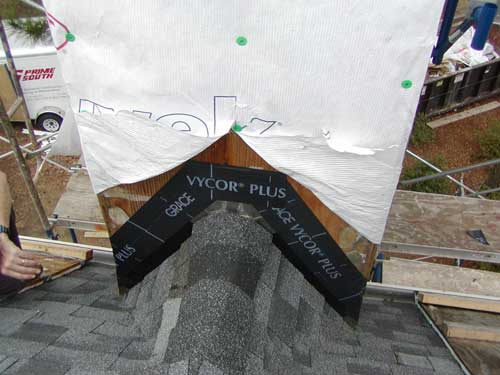
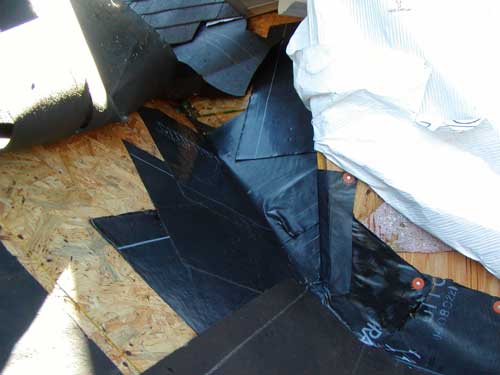
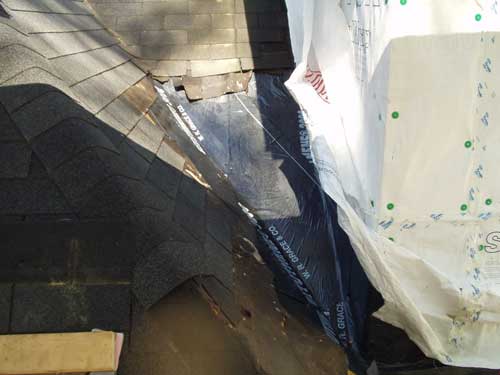
![]() TRAPPED VALLEY
TRAPPED VALLEY
This area funnels large amounts of water and often gets clogged with leaves. Water commonly can back-up and flood over flashings and under shingles leading to intrusion into the wall cavity.
Waterproof membrane applied to roof beneath shingles.
Waterproof membrane applied to roof beneath shingles.
Waterproof membrane applied to roof beneath shingles.
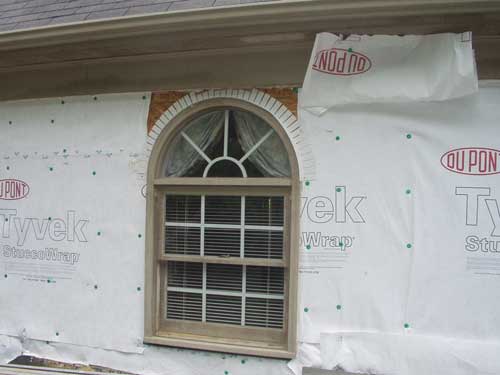
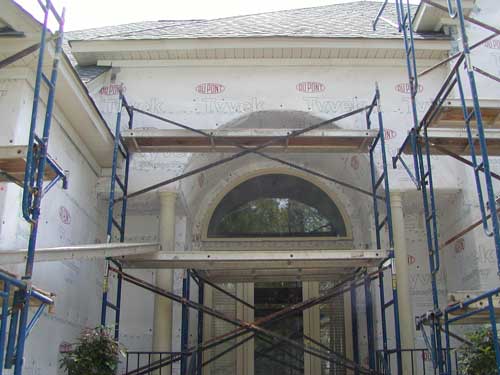
![]() HEAD FLASHING
HEAD FLASHING
Windows and doors should have flashing properly installed at the top of them to prevent water intrusion behind the window.
The sides of this radius window are first sealed over the house wrap.
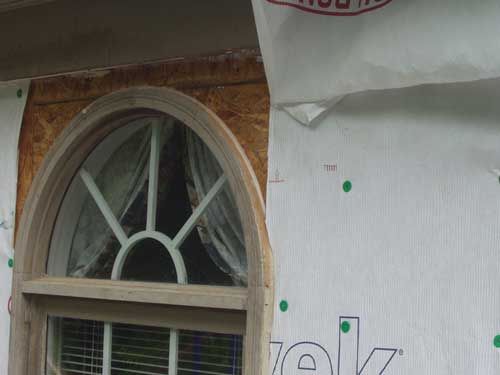
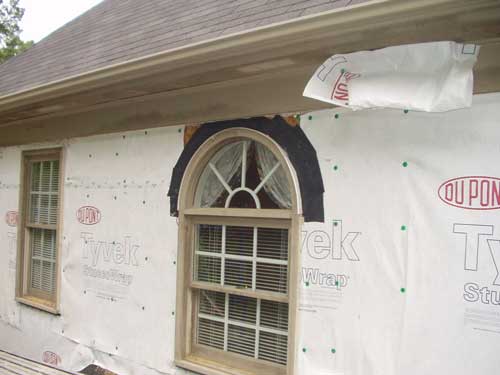
The top has a piece of “radius head flashing” installed over it with sealant.
Waterproof membrane is applied over the flashing.
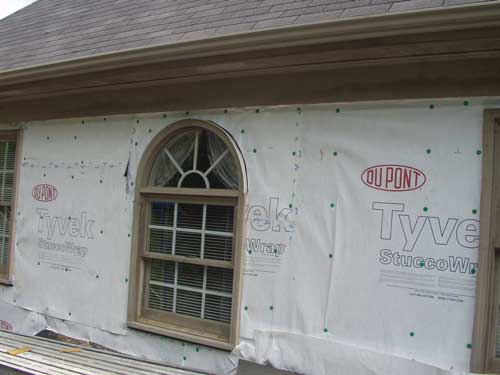
The house wrap is installed over the flashing.
![]() HOUSE WRAP
HOUSE WRAP
The house wrap is your secondary weather barrier. It should be correctly installed along with properly installed flashings. It is good practice to use button caps for the installation as well as house wrap tape on the seams.
House wrap properly incorporated with flashings.
House wrap on front of a house
New cladding installation over properly installed house wrap.
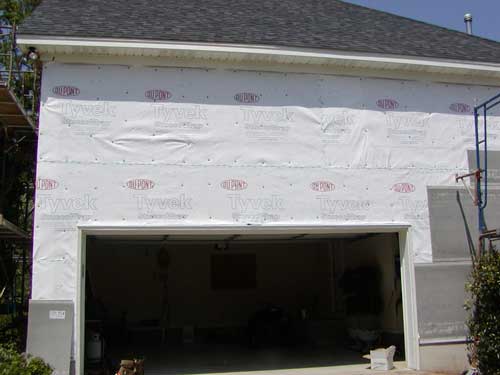
Front of a house with properly installed house wrap and flashings is now ready for the new wall cladding.
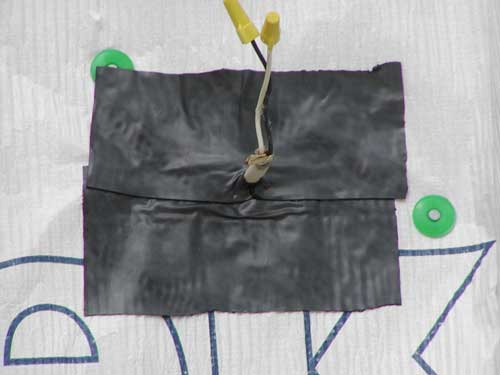
![]() WALL PENETRATIONS
WALL PENETRATIONS
All wall penetrations must be sealed properly, even wires and pipes.
Waterproof membrane at wire.
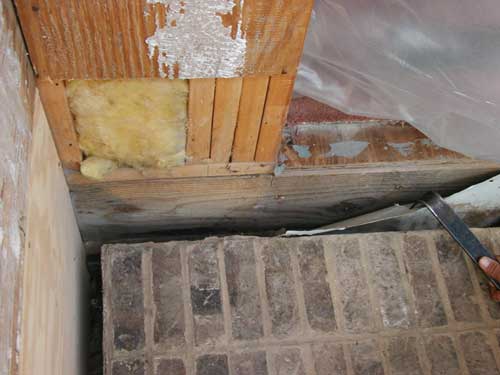
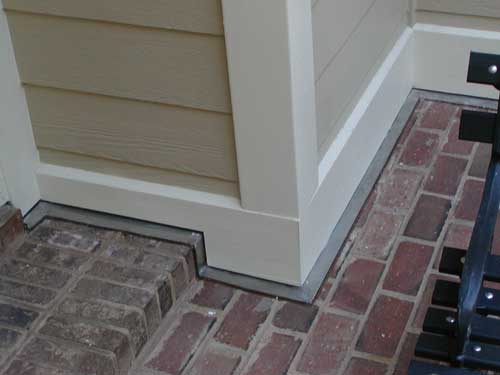
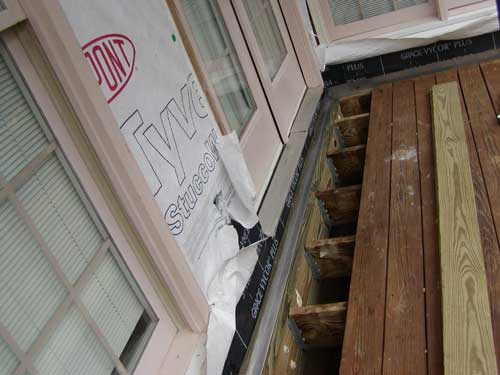
![]() PORCH SLAB AGAINST WALL
PORCH SLAB AGAINST WALL
There are several factors to consider at areas similar to this. Mainly, the wood framed wall must be protected from moisture and the new wall cladding must be allowed to drain.
Existing cladding is removed and damaged wood is replaced. This leaves a void between the porch and wall.
The sheathing is protected with a waterproof barrier and the void is filled with concrete.
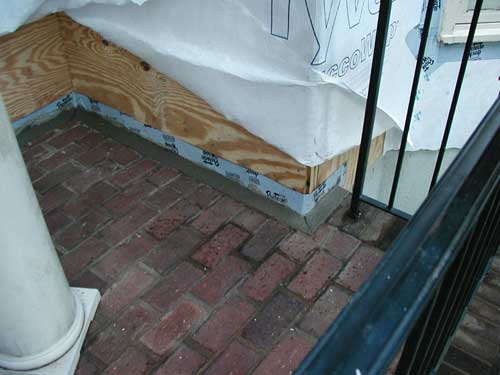
A slot (or curf) is cut into the porch top.
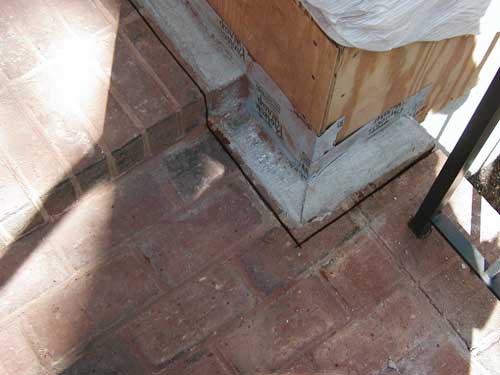
Stainless steel or copper flashing is bent to continue down the wall and across the porch top then turned into the curf and sealed. The flashing is soldered at the joints, not caulked.
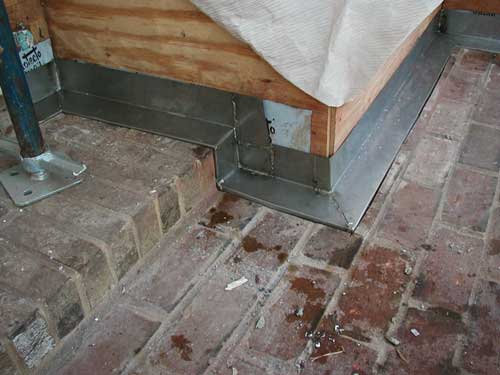
A waterproof membrane flashing is applied to the top of the flashing lapping onto the wall. The house wrap then laps over the face of the flashing.
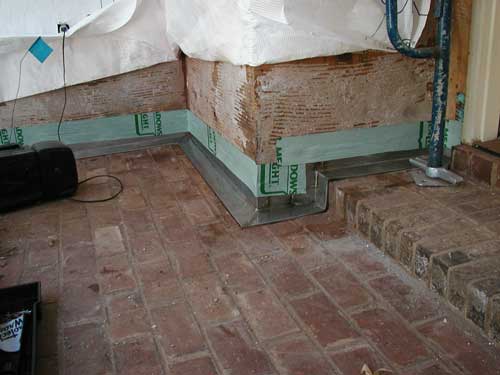
The new cladding is installed leaving a drainage gap at the bottom.
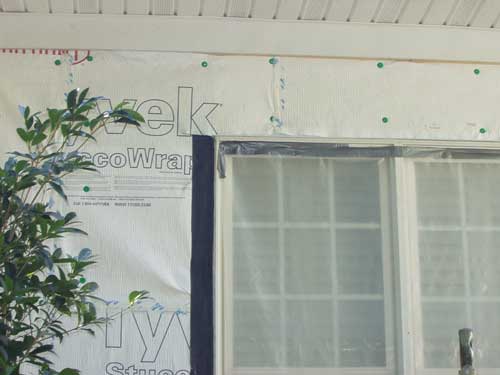
![]() WINDOW SIDES
WINDOW SIDES
It is important that the sides of the windows are sealed to the house wrap to avoid water penetration behind them.
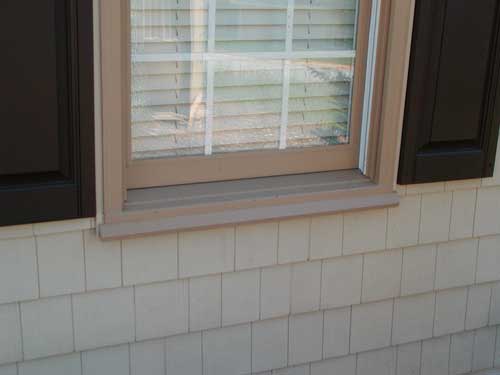
![]() WINDOW SILLS
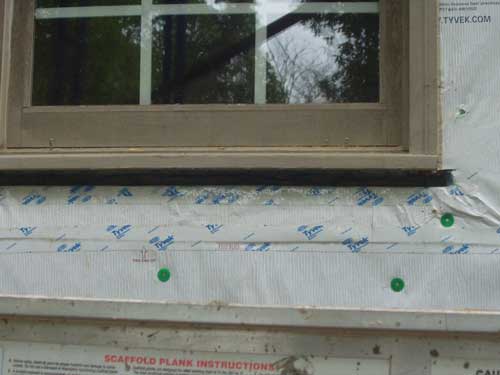
WINDOW SILLS
Water commonly penetrates behind wall claddings at window areas. The water may enter improperly sealed gaps between the wall cladding and the window. Often water may enter through the window itself, weather its wood, metal clad, vinyl clad, expensive, or cheap. Windows need a pan flashing or waterproof membrane flashing installed beneath them between the bottom of the window and the wall framing. Most of the time, the window must be removed to allow proper pan flashing beneath it or an engineered flashing pan should be installed.
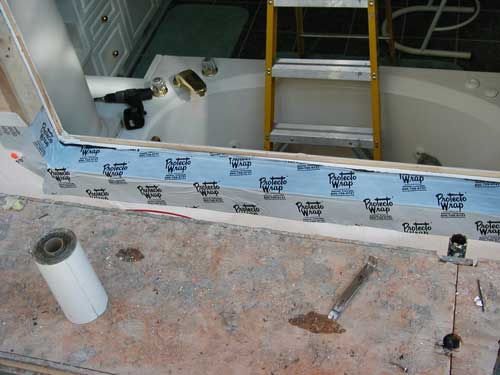
A slot is made beneath the window and waterproofed.
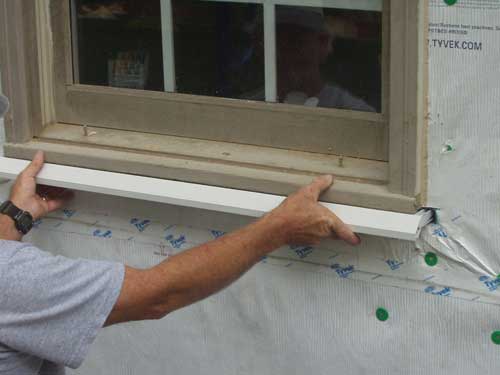
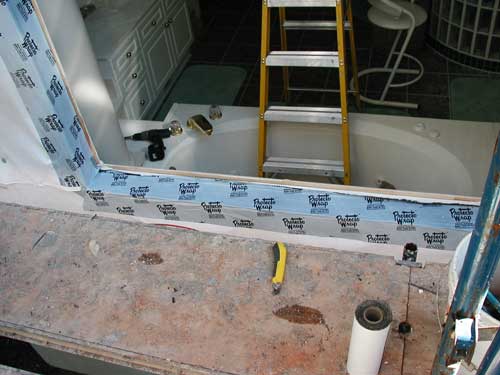
PVC engineered pan flashing is cut to fit and installed beneath the window.
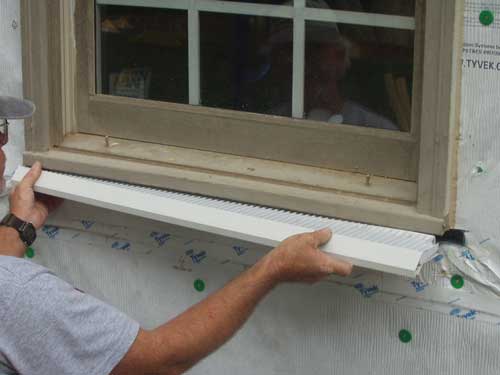
The pan slides into place.
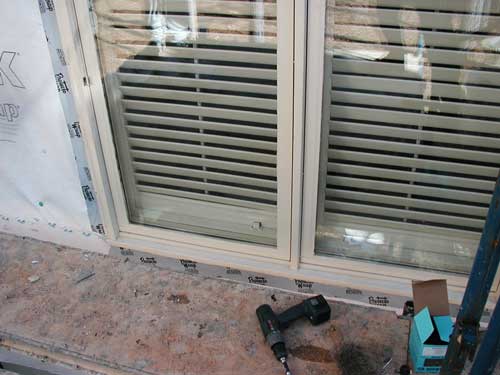
Finished product in a stucco house.
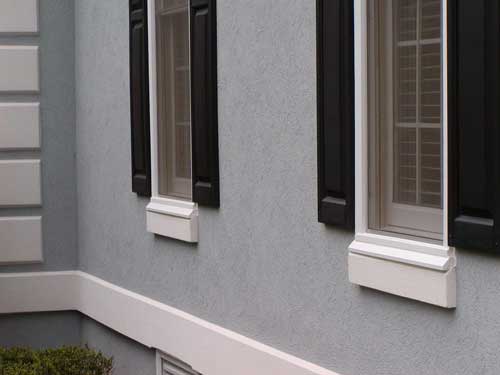
Finished product in a cedar sided house.
Rough opening with waterproof membrane wrap on sill.
Rough opening with waterproof membrane wrap on jambs.
Window installed in rough opening wrapped with waterproof membrane.
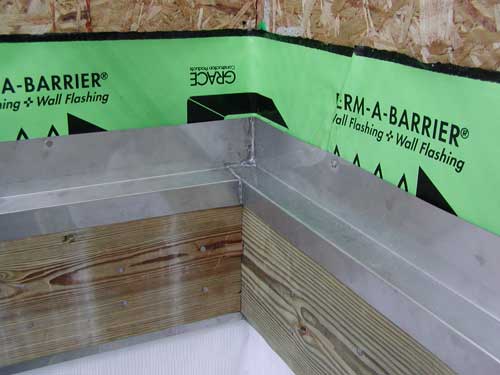
![]() DECK CONNECTIONS
DECK CONNECTIONS
Decks must be properly flashed to prevent water intrusion and damage to the wall framing. There are many different methods to properly attach the deck to the house and different methods to flash them too. During a reclad restoration, decks usually need to be detached from the house to allow for proper waterproof flashing installation.
This deck has a perimeter band attached against a waterproof membrane on the house with stainless steel flashing over the top of the band. A second band is attached to the band connected to the house to allow deck plank installation without penetrating the top of the stainless steel flashing.
This deck has a perimeter band attached against a waterproof membrane on the house with stainless steel flashing over the top of the band. A second band is attached to the band connected to the house to allow deck plank installation without penetrating the top of the stainless steel flashing.
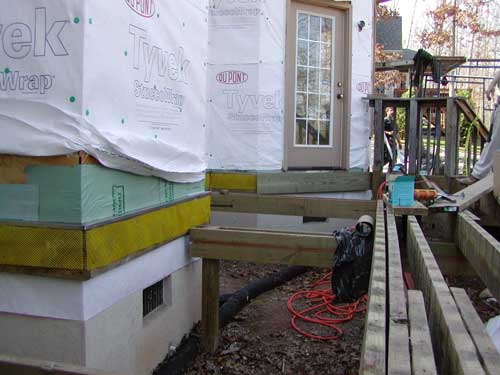
This deck band assembly has framed wall area beneath it. It requires a waterproof membrane and two “Z” flashings, one at the top and one at the bottom, properly incorporated with the house wrap. It will have another band attached to it for the nailing of the deck planks. The house wrap will overlap the top of the flashing before the new cladding is installed.
![]() HOUSE WRAP
HOUSE WRAP
The house wrap is your secondary weather barrier. It should be correctly installed along with properly installed flashings. It is good practice to use button caps for the installation as well as house wrap tape on the seams.
House wrap properly incorporated with flashings.
House wrap on front of a house
New cladding installation over properly installed house wrap.
Front of a house with properly installed house wrap and flashings is now ready for the new wall cladding.